I had a few inquiries on MWD about the cemetery set for the latest episode of Zombieville, so below I’ve collected some notes and photos that I created during its creation.
Isabel shows what the forest looked like on March 17th, 2013.
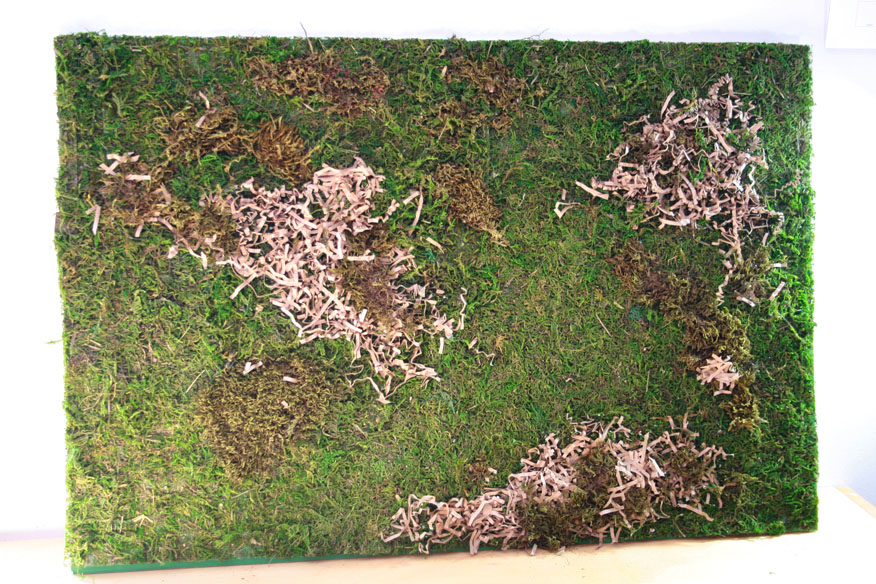
Because I disliked the uniform greenness of the ground, I applied patches of brownish green moss to add color variation and slight differences in terrain. I also purchased a bag of brown "crinkle paper," also called "basket shred," which is sold for packaging purposes. I cut it into strips and glued it down to represent humus.
I also added some underbrush. I purchased two sprays of plastic greenery, one with elliptical leaves, one with round leaves. I then separated three or four stems’ worth from the main bunch and prepared a base for them out of polymer clay: a mound with tapered edges. I jammed the stems into the base, then pulled them out, thus making guide holes. After painting the base green, I cured the polymer clay, which both dried the paint and hardened the clay! [I hate waiting for paint to dry.] I used hot glue to secure the stems in the guide holes, then a combination of hot glue and white glue to make "tree skirts" out of moss to blend the bases in with the rest of the ground cover.
Isabel shows off the forest as of March 24th, 2013.
A bit later, I added some clumps of small trees [slender twigs] and larger trees [small logs], also in bases of painted polymer clay.
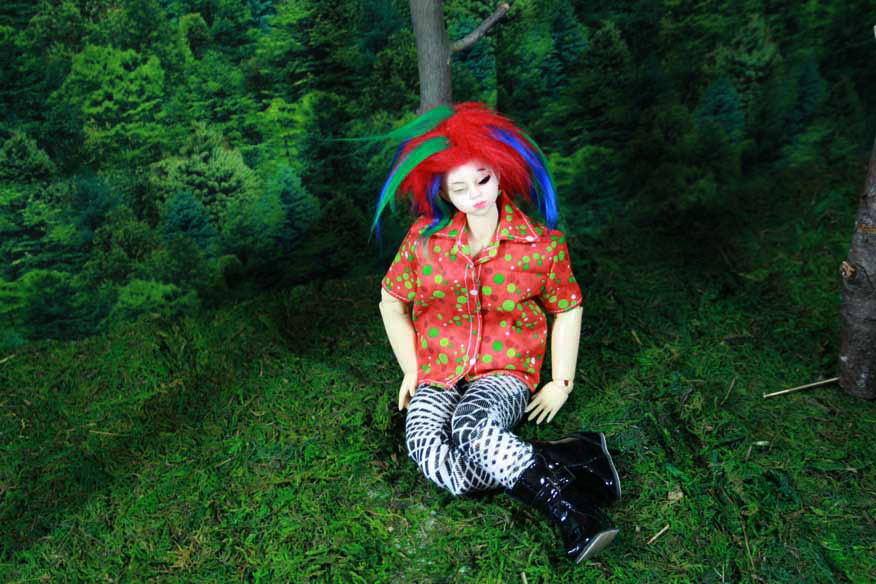
Isabel stands in the forest as of March 29th, 2013.
The forest still needed filler. I got some sprays of plastic leaves, small enough to pass for young 1:6 scale trees, at the craft store today. I mounted them in the usual moss-covered bases made of cured polymer clay painted brown.
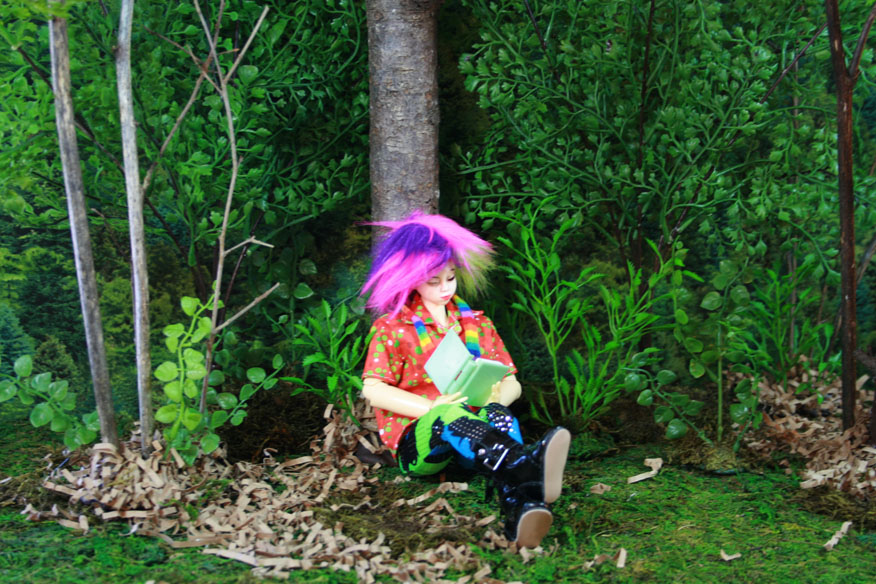
Isabel reading in the forest as of March 30th, 2013.
I tried adding some green crinkle paper for additional ground cover. It was too blue. Dammit!
Flower demonstrating the failure of ground cover in the forest as of May 3rd, 2013.
I finally got some crinkle paper of a better color.
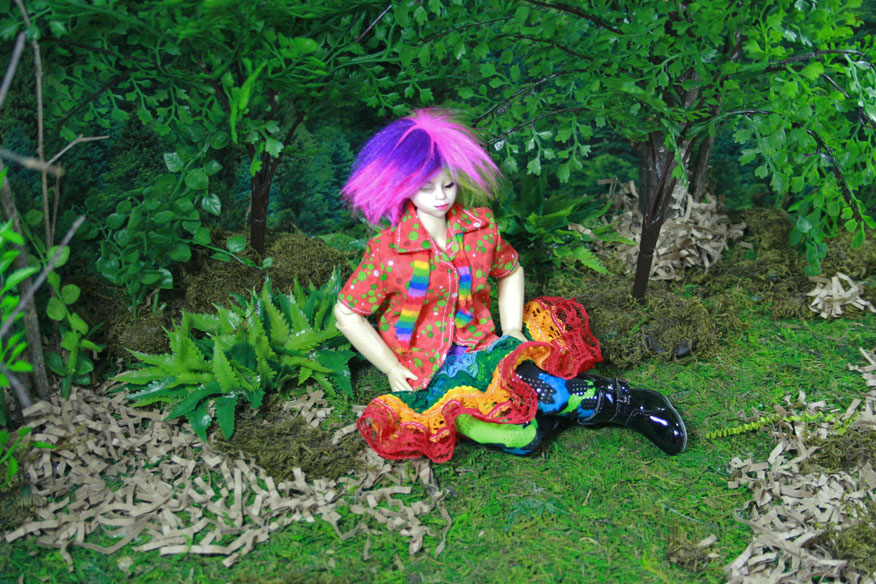
Flower and Epona showing the new bright green crinkle paper as of May 14th, 2013.
Later the forest acquired ferns from the clearance section of the craft store. I mixed up Aves Apoxie Sculpt and flattened it out into a strip about 1.5cm thick. Then I pressed moss into the strip until most of the grey Apoxie Sculpt was covered. I removed the leaves from the fern stems and stuck them individually into the still sticky Apoxie Sculpt.
Isabel in the forest as of July 7th, 2013.
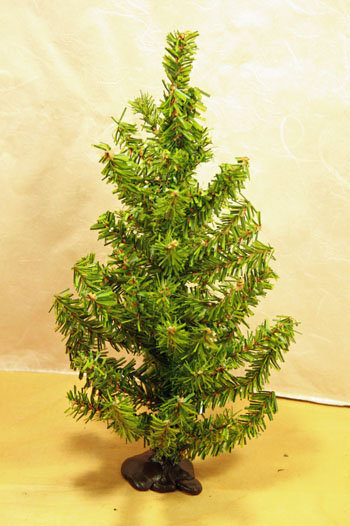
Finally, when the end of the year rolled around, I picked up some 11" pine trees with poseable branches. I made my own bases for them of painted Aves Apoxie Sculpt.
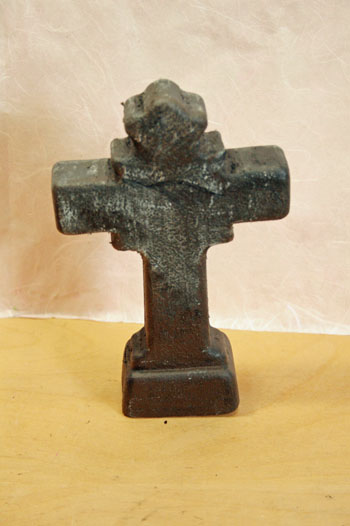
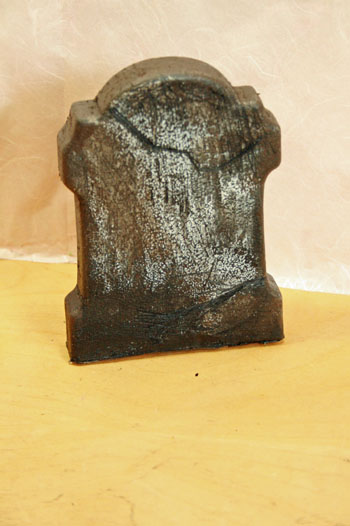
As for the statuary, the gravestones started off as plastic table decorations for Halloween.
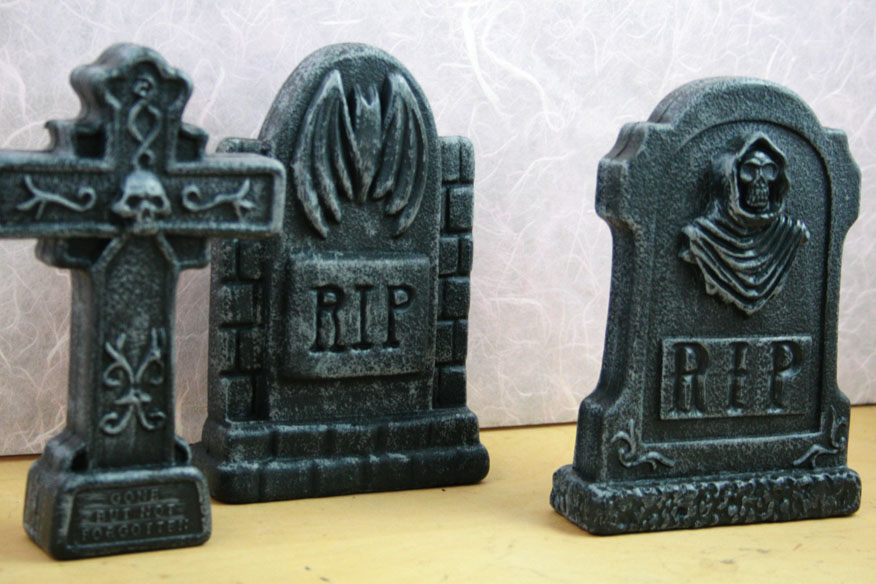
Since the fronts looked like no actual gravestones I have ever encountered, I decided to only show them from the back. I weathered them by dry-brushing them with white acrylic to show up the default texture, which was actually convincingly stone-like. I also used black and brown acrylic to add stains. Strategically placed gouges from my Dremel and craft knives looked like cracks.
This is what they look like now:
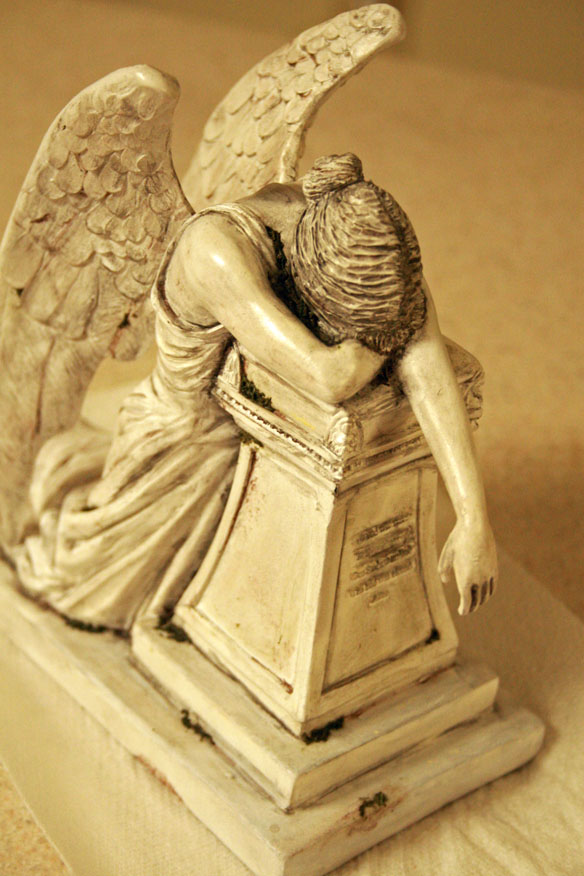
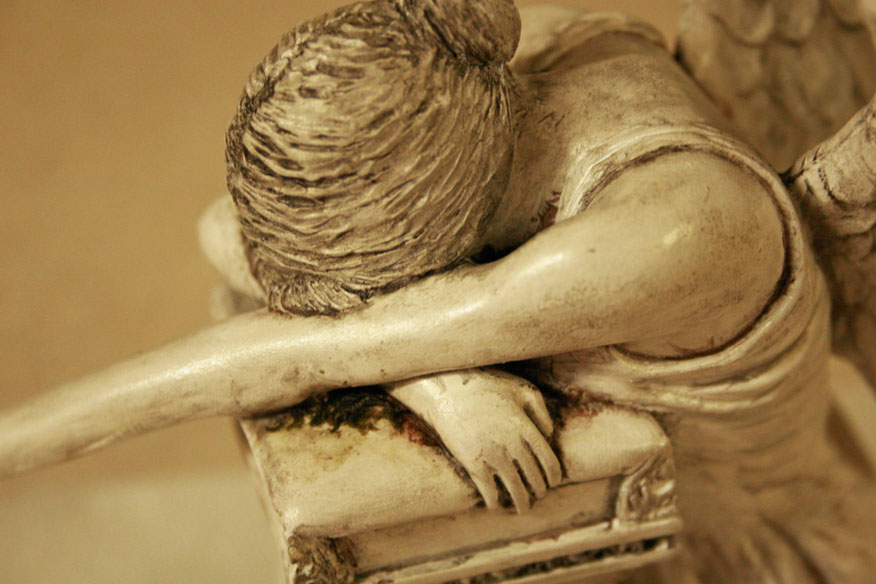
The angel statue is not, as some of you think :p, a Weeping Angel. She’s the Angel of Grief, originally carved by William Wetmore Story for his wife’s tomb. When I got her from Design Toscano, she initially looked like this, i.e., a shitty paperweight:
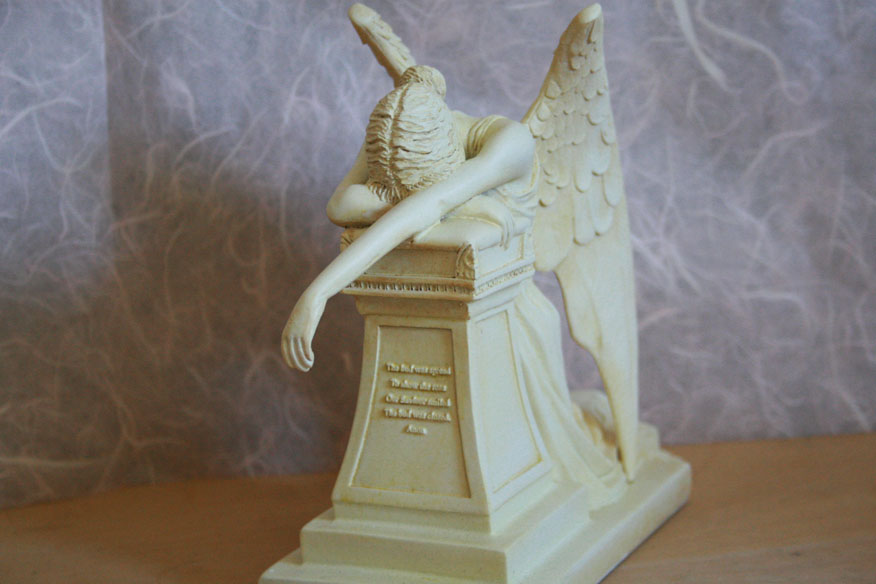
First, I applied black chalk pastel, diluted with a little water, in the folds and hollows of the sculpture. I used paintbrushes, wet smudge sticks of paper towel and my fingertips for adding color. The deepest crevices, of course, received the most shading. I added a lot of color, then ended up wiping much of it off, going for a mottled, aged appearance.
Second, I applied dark brown chalk pastel in areas where dirt might collect and also on various surfaces for general staining. I found that stippling with the tip of a small paintbrush produced convincing blotches of dirt.
Third, I added small bits of dried moss that I had chopped up even more finely with a craft knife. I painted some Mod Podge in the area where I wished to stick moss — various creases of the statue, as well as the deepest hollows. I then picked up some moss on the sticky paintbrush and pushed it into place.
The result:
This entry was originally posted at http://modernwizard.dreamwidth.org/1655560.html. You can comment here, but I’d prefer it if you’d comment on my DW using OpenID.